Tips On How To Make Perfect Shortcrust Pastry - Get Superb Results Every Time
I have been making pastry for many years. When I was a child, I spent hours after school in awe watching my nan bake cakes and pies. She made a point of always making her own shortcrust pastry. She would tell me how much better it tastes when you make your own and she was right. It’s also so easy to make. Yes, I know everyone makes out that pastry is difficult to make but with the right tricks you’ll never bought shop bought again. Mainly because, as I said earlier, it tastes so much better. Buttery, crisp and flaky, made right pastry can be amazing.
Another place I learnt a lot about pastry was at college. I studied level 3 Patisserie, so it’s fair to say I should know just a bit about pastry! I learnt about all things choux, puff, filo and hot water crust. But my all time favourite type of pastry is shortcrust, and it’s definitely the one I have practiced the most. This is the pastry I’ll be talking about in this post, although these tips apply to most other pastries too!
On this page I’ll list some tips and tricks on how to get the perfect pastry, every time.
There’s no order of significance here – all of these tips are important in their own way.

1: Everything should be as cold as possible
This is probably the most important tip. When making pastry, you should use cold butter. This is because the butter is prone to melting into the flour when worked in your warm hands. If this happens, it will be harder to achieve a crisp, flaky texture in the final product. Instead, it will be tough and rubbery.
To help prevent any of these issues, use butter that’s straight out the fridge. Also, try to work in a cool kitchen with cold hands. If you’re one of those people whose hands are naturally warm (like me), has try running cold water over your wrists instead of your hands. This is an effective way of cooling your hands down quicker.
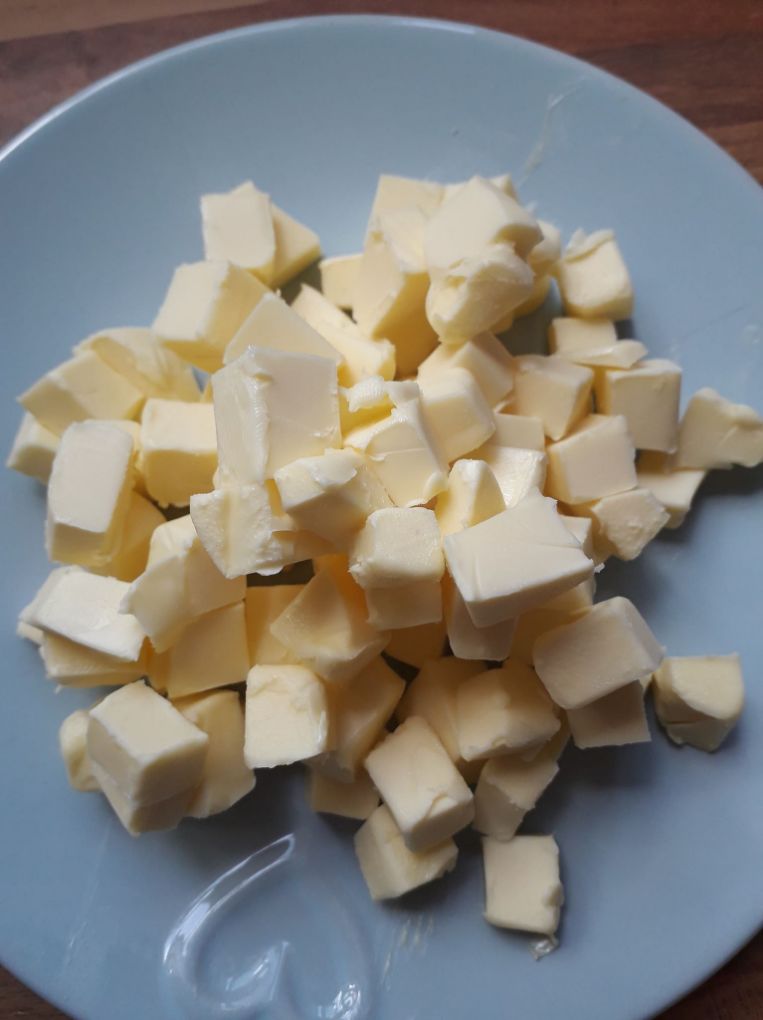
2. Cut the butter into cubes before using
Before starting, cut your butter into small cubes (about 1″ wide) and then put back in the fridge. You’ll find when you cut the butter, the warmth of your hands can make the it melt quicker. I think it’s crucial to get the butter back to a cold temperature before using it to ensure everything is as cold as possible.
3. A lot of time making pastry is spent waiting while it's "resting in the fridge"
Pastry is easy to make, but it can be time consuming. And not because you’re slaving away with endless steps to do. But because you spend a lot of time waiting for the dough to rest in the fridge. So a lot of resting time for me too usually! Whenever the recipe says to put the dough in the fridge, don’t skip this step. It’s especially important to chill your dough before baking as this will reduce it from shrinking away from the tin.
4. Use egg in your pastry, not just water
I see so many recipes that use only water as the binding ingredient, and I’m always thinking ??? In college, we learnt to always make shortcrust pastry with the addition of an egg as well as water. This little extra ingredient makes a world of difference in your pastry. It gives it a rich flavour, as well as being a more effective way of binding the dough together and making it easier to work with and roll out.
5. I recommend using your hands rather than a food processor
Don’t get me wrong, using a food processor to whizz your ingredients together is an effective way of cutting down time. But for me, using your hands is the best way to go, and it’s the way I was always taught. In fact, it’s 100% not a lie when I say I have actually never made pastry any other way! Maybe I’m stuck in my ways, but there’s something therapeutic about getting stuck in with your hands. It also helps to better understand the process of making pastry. You get a better feel for when the dough is at the right consistency and it’s easier to avoid overworking the dough.
6. Use the "rubbing in" technique until breadcrumb consistency
The “rubbing in” method is when you rub chilled, cubed butter into plain flour with your fingers. You do this until it reaches breadcrumb consistency. This video provides a great visual guide on how to do this. You should try to rub it lightly between your fingers, not your palms. Be quick with your movements to try to lessen the chance of the butter melting. Keep doing this for about 5 minutes, until it starts to look more like breadcrumbs. If you give the bowl a good shake, all the large lumps of butter will rise to the top and you can rub those in. Some recipes will call for coarser breadcrumbs, which is when you leave in larger lumps of butter. Although I always do this technique until it resembles fine, even breadrcrumbs.

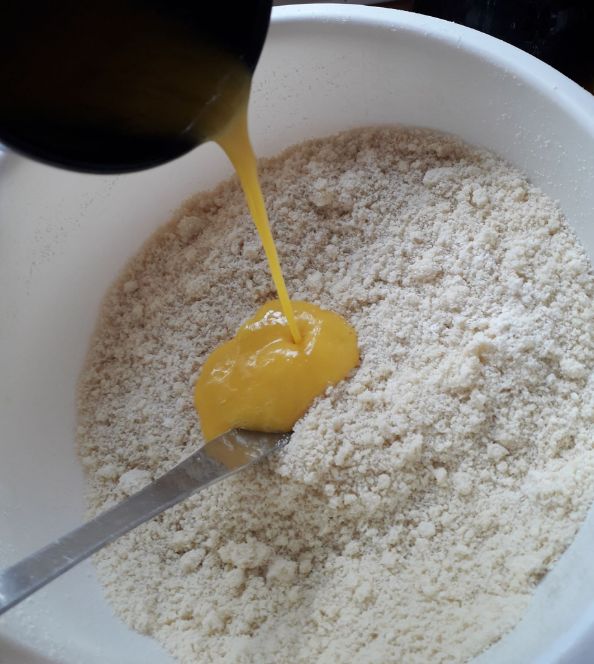
7. Use a butter knife when adding the water and egg
This only applies if you’re making the pastry by hand. When adding the egg and water to the breadcrumb mixture, it’s best to use a butter knife to mix the ingredients together before using your hands. This stops you from squeezing the dough together and overworking it, resulting in a tough texture.
8. Don't overwork your dough
When you knead and work the dough too much, the more gluten the flour produces. This results in a tough, dense and chewy pastry. Once the dough has come together into a ball, press it together gently and form it into a flat round. There’s no need to knead it like you would with bread dough. If you get this right, you’ll end up with a flaky, crumbly and tender pastry. The ideal shortcrust!
9. Butter, oil or lard?
Lard, oil and shortening are all traditional ingredients used in pastry. I always use buter for a rich flavourful pastry. If you’d like an in depth description on the pros and cons of using each ingredient, this page is great! Use good quality butter as cheaper butter has a lower melting point, making it difficult to work with.
10. The dough should be room temperature before it's rolled out
Although it’s important to keep the dough cold throughout, it should be malleable when rolled out. Once you have made the dough you can leave it in the fridge until you’re ready to use it. But you should take the dough out the fridge for about 10-20 minutes before you roll it to ensure it’s warmed up a bit. Not only will it be like trying to roll out a brick when it’s straight out the fridge, but all that force you’ll need to roll it out will crush the delicate layers in the pastry and make it dense and brittle.
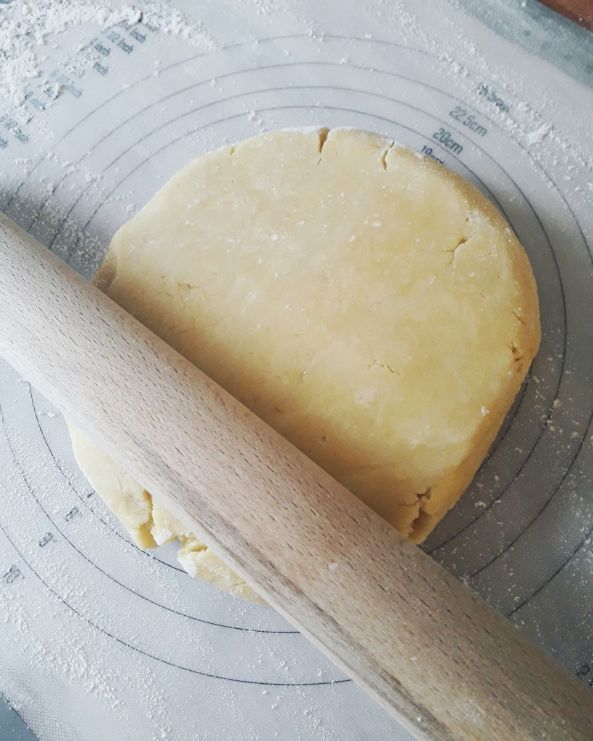
11. This silicone non-stick mat makes rolling out pastry a dream
This silicone non-stick mat is great and has made my life a lot easier since buying it. With no flour required, it allows you to roll out your pastry without it sticking and without adding any flour to the dough. It also has guidelines to help you roll out a perfect circle that fits your tin.
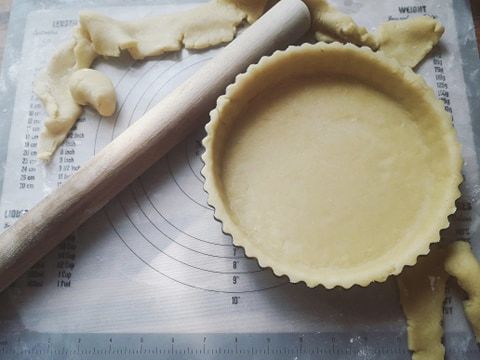
12. Repair any wholes with extra pastry
When rolling out pastry and lining tart cases, sometimes you might find it tears and a hole forms. If you leave it, the filling will leak out when cooking. Instead, fill in any tears/holes with extra pastry. Once it’s cooked, filled and decorated, you wont even be able to tell! To avoid making holes/tears in the first place, try to be very gentle with the pastry and avoid stretching it too much when rolling it out.
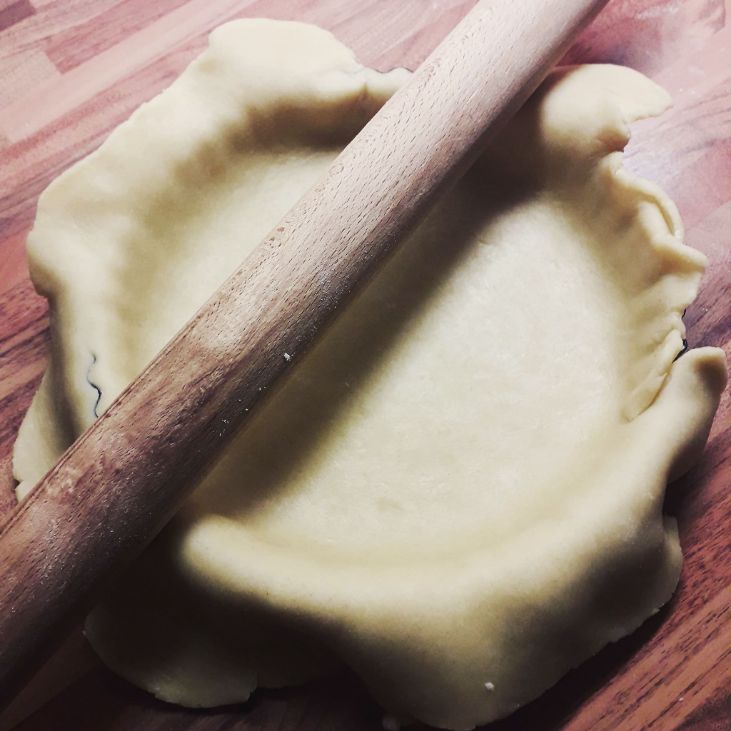
Also, if you struggle with transferring the dough to your pastry tin, there’s an easy way! Roll up the dough round your rolling pin and then unroll it straight over your tart tin. It helps to take a little bit of dough, roll it into a ball, dip it into flour and then use that to press the dough into the corners. This reduces the chances of your finger poking a hole through the dough. Then, roll the top of the tin with the rolling pin to cut off all the excess dough (as in the photo). I like to then press the edges again so the edges are slightly raised up out of the tin which helps when the dough shrinks in the oven.
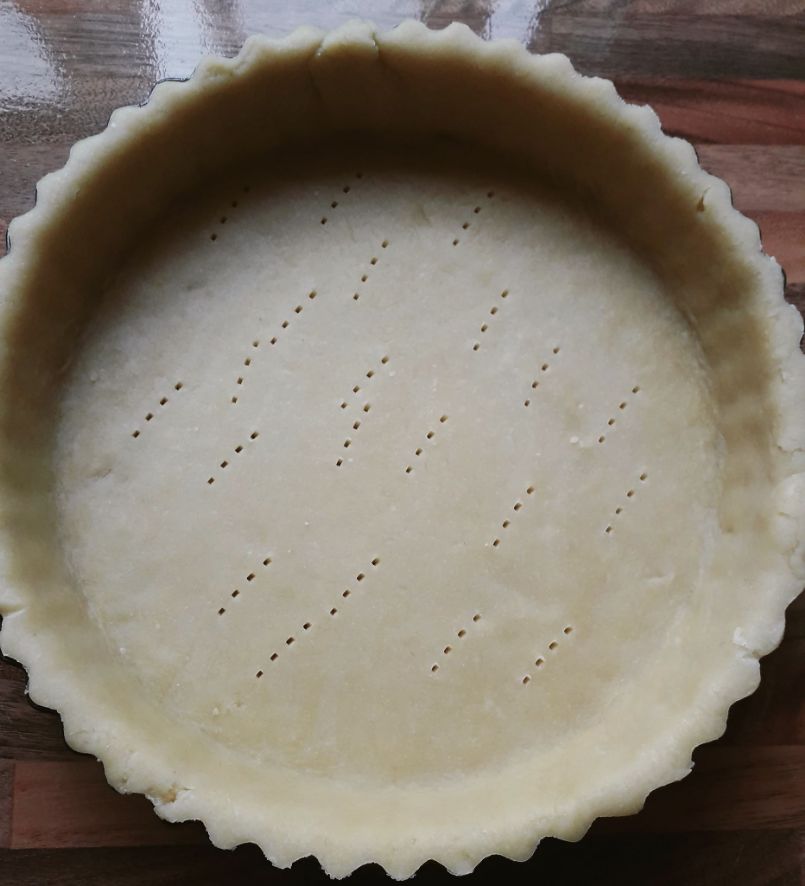
13. Make sure to prick your pastry with a fork
This is a very important step. Before baking, prick the base of the pastry with a fork all over. The holes will allow steam to escape while baking. If you don’t do this step (which I’ve forgot to do many times) you’ll find the pastry balloons up in the oven with trapped air. Also, once you have blind baked your pastry and then brushed it with egg wash, you should prick the base with a fork again. The egg wash will seal up the holes you already made, so just re-prick the base.
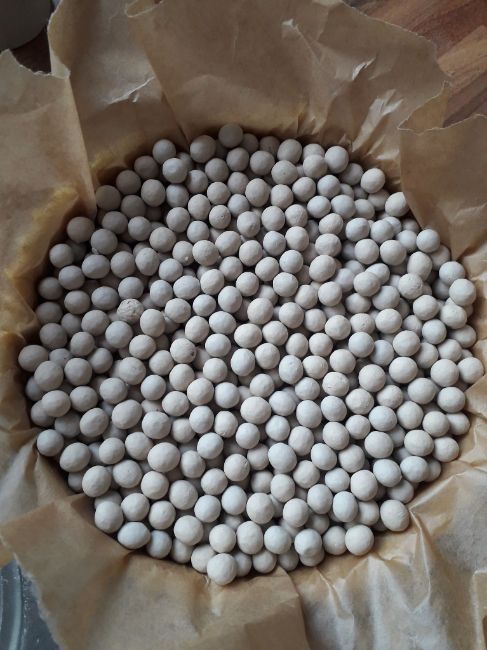
14. Blind bake your pastry
Baking beans and baking paper is the saviour to stop soggy bottoms in pastry! If you put a filling straight onto raw pastry and try and bake it, you’ll end up with a soggy bottom. To stop this, cover the pastry with baking paper and then fill to the top with baking beans. If you don’t have any, use dried beans, lentils or rice instead. Bake at 160º until the pastry has cooked but not developed any colour yet. Then remove the baking beans and baking paper, prick the base, egg wash and carry on baking until crisp and golden brown.
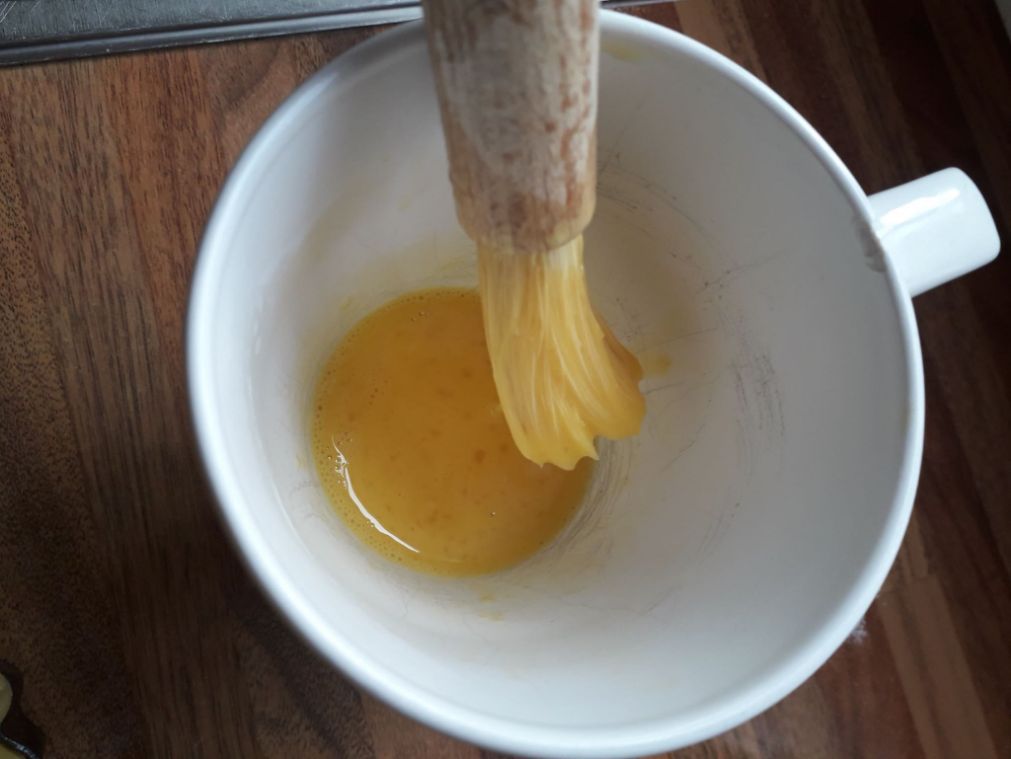
15. Egg wash makes your pastries look even more divine
An egg wash is a mixture of egg and either milk or water. I use water; 1 tablespoon of water for every egg. Beat the mixture with a fork until combined and that’s it! You can use egg wash to bind and seal dough together. After blind baking, brush the whole pastry with egg wash and then carry on baking until fully cooked. The egg wash cooks as the pastry does, creating a glorious golden sheen and a rich even colour. If you want an even deeper golden colour on your baked pastries, use egg yolk instead of the whole egg. The egg wash also acts as a sealant in between the pastry and the filling. This prevents what’s known as a “soggy bottom”. This is when moisture from the filling leaks through moisture to the bottom of the pastry, causing it to become soggy and dense.
Here is my go-to shortcrust pastry recipe which never fails me, along with a step-by-step method. With all these tips and tricks and a bit of practice, you should end up with perfect pastry!
- 150g unsalted butter
- 300g plain flour
- pinch salt
- 1 egg
- 2-3 tbspn water
- if you are making sweet shortctust, add 30g caster sugar
- Rub in the cubed, chilled butter to the flour and salt until breadcrumb consistency
- If you are making sweet shortcrust, add the sugar
- Add the egg and water and combine until a ball has formed
- Chill in the fridge for at least 20 minutes
- Roll out and line your pastry tin then chill again
- Blind bake at 160º for 10 minutes, then egg wash and bake for a further 5 minutes or until golden brown

I hope you liked this page on tips on how to make perfect pastry. Please leave a comment below if you have any of your own tips and tricks!